Add Employee 
To manually add a new Employee to your Organization:
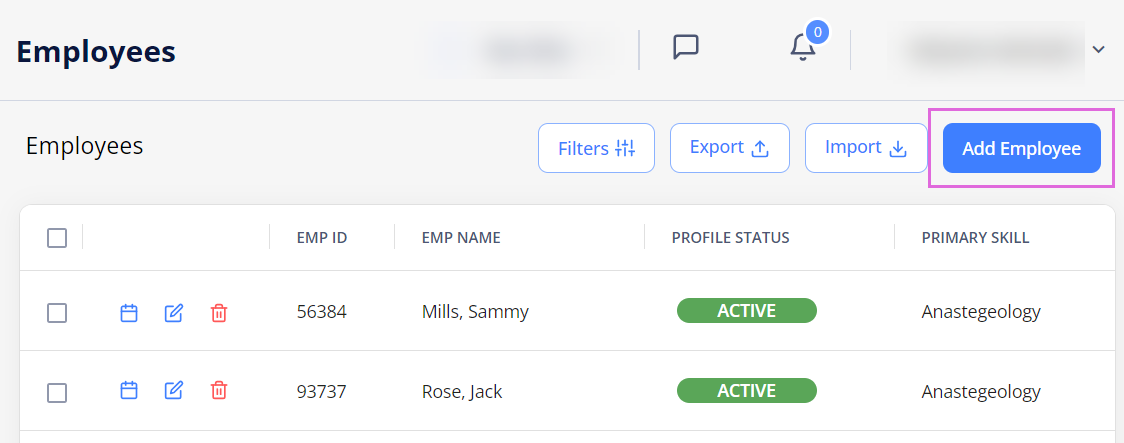
- On Employees, select Add Employee above the grid. Hide the imageSee the image.
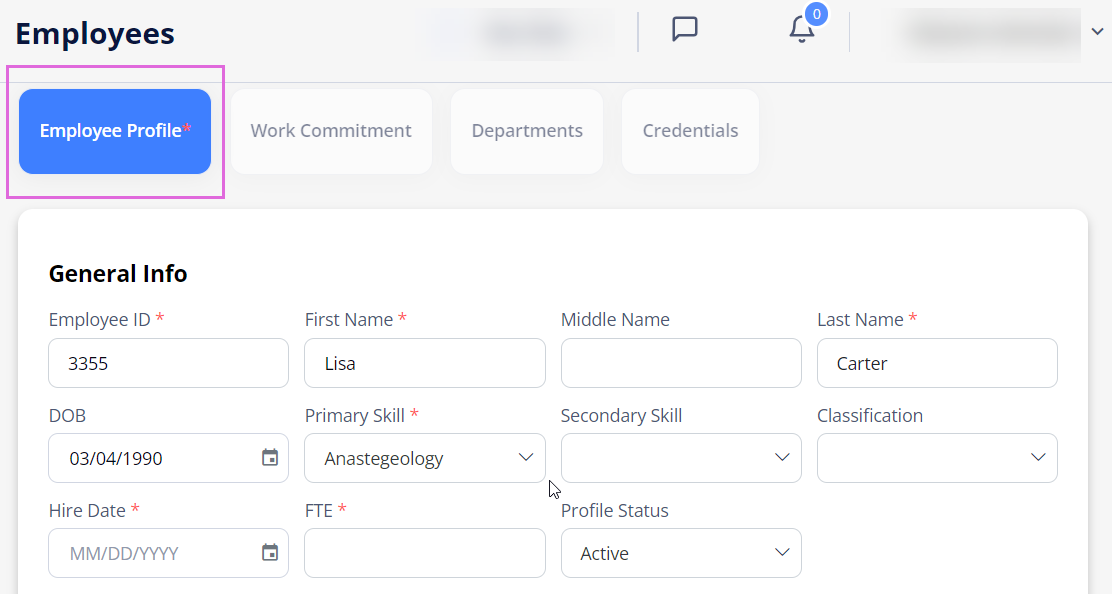
- On the Employee Profile tab, fill in all the required (*) fields and upload the Employee's profile picture in PNG or JPG format (up to 20 MB.) Hide the imageSee the image.
- In the General Info section, you must select primary skill(s) before secondary skill(s). Changing the primary skill automatically clears the secondary skill.
- In the General Notes section (if you have the proper permission), you can view, export, add manually, or import notes related to the Employee being added. Hide the imageSee the image.
To manually add a note, select Add Note, provide the details, and save it.
To import multiple notes at a time, select Import and follow the instructions in Import general notes.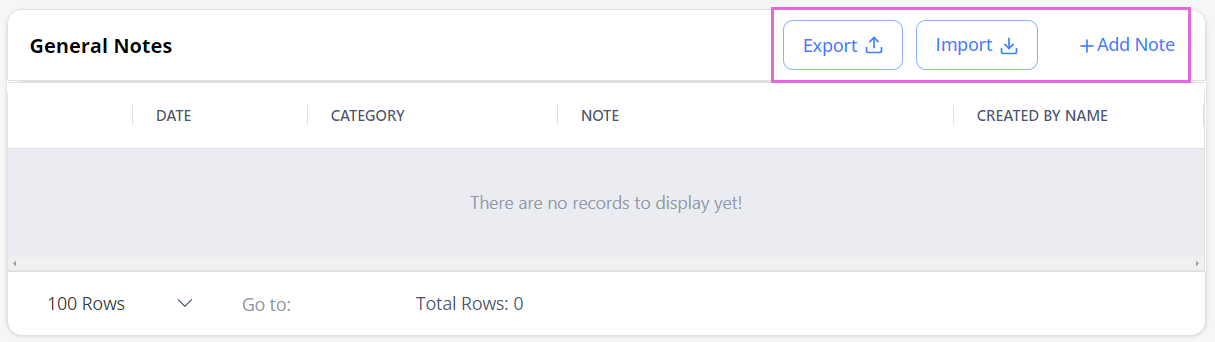
- On the Work Commitment tab, add the Employee's work commitment(s).
- On the Departments tab, view the departments automatically assigned to the Employee, and assign the additional ones manually.
- On the Credentials tab, add the Employee's credentials and update the list of those required in the assigned departments.
- (Optional) If you have permission, you can use the Tags option to add keywords or labels (Maximum of 50 characters) to an employee (See the imageSee the image).
- To filter employees by tags in Employees, go to Filters > Tags (See the imageSee the image) and select the required tags.
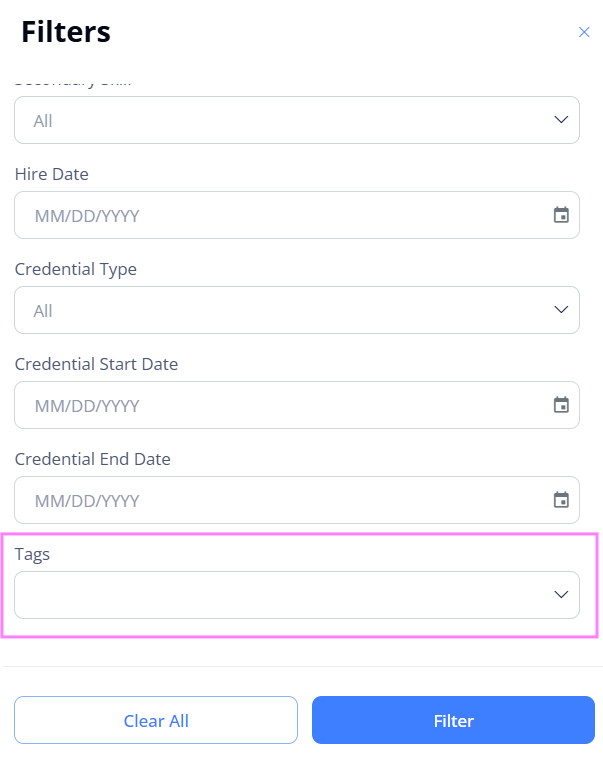

- To filter employees by tags in Employees, go to Filters > Tags (See the imageSee the image) and select the required tags.
If the proper configuration is enabled for your Organization, adding a new Employee profile (with Active status) automatically creates a new Employee user with the specified details if no such user already exists.
- This new user will have the default visibility to all regions, locations, and departments assigned to them within your Organization.
Import general notes
To import multiple notes at a time from an Excel file:
- On the Employee Profile tab > General Notes section, select Import. Hide the imageSee the image.

- In the Import sidebar, select Download Template. Hide the imageSee the image.
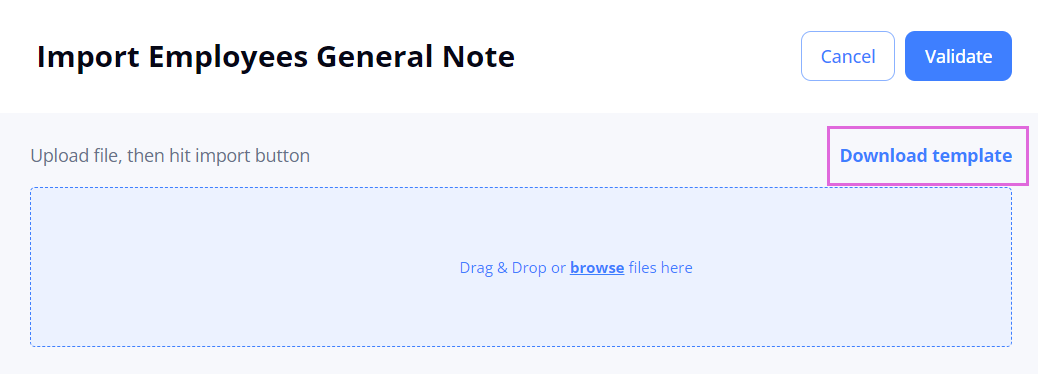
- Open the downloaded Excel file and fill it in by following the specified instructions.
- The Employee Name field is optional, while all the other fields in the file are mandatory.
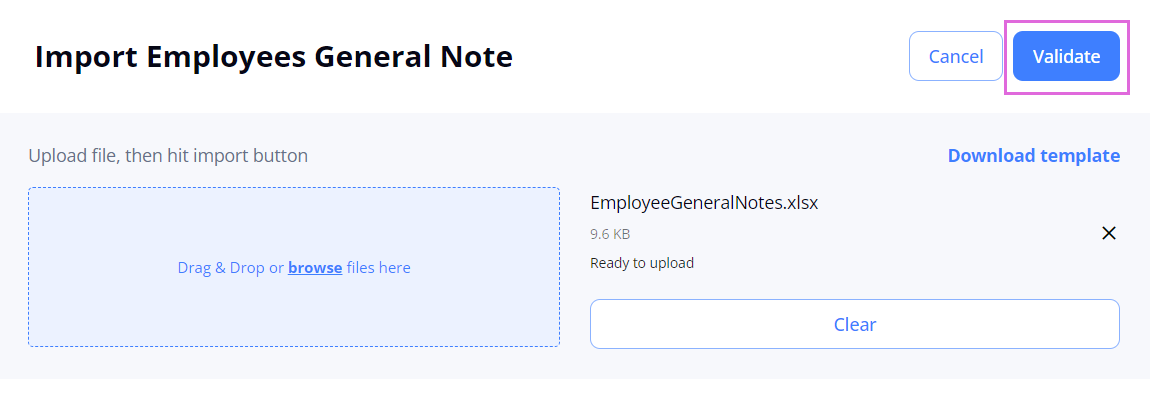
- Upload the file with the added information into Einstein II IRP.
- In the upper right, select Validate (Hide the imageSee the image) and check the data on the following tabs:
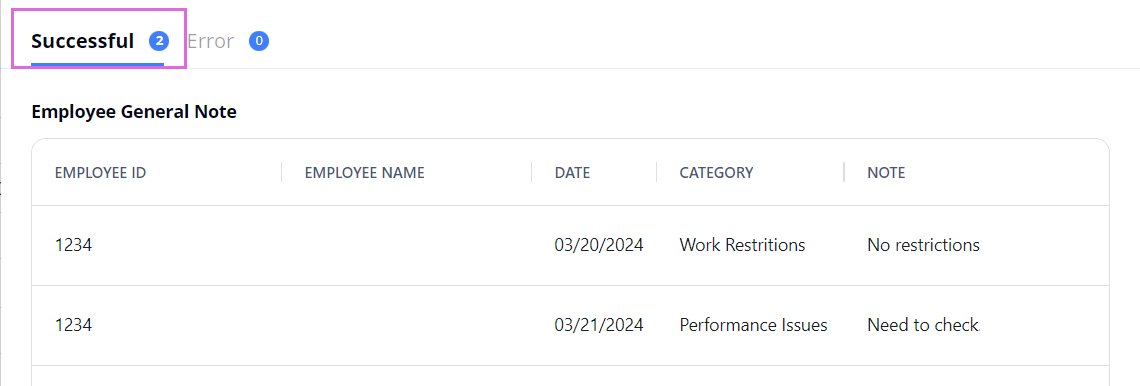
- The Successful tab displays successfully processed note records (Hide the imageSee the image.) To import them, proceed to Step 6.
- The Error tab displays note records that failed to be processed. To fix the errors, select Download file with Errors (Hide the imageSee the image), make the needed edits in this file, and re-upload it into the system. Then, to import the records, proceed to Step 6.
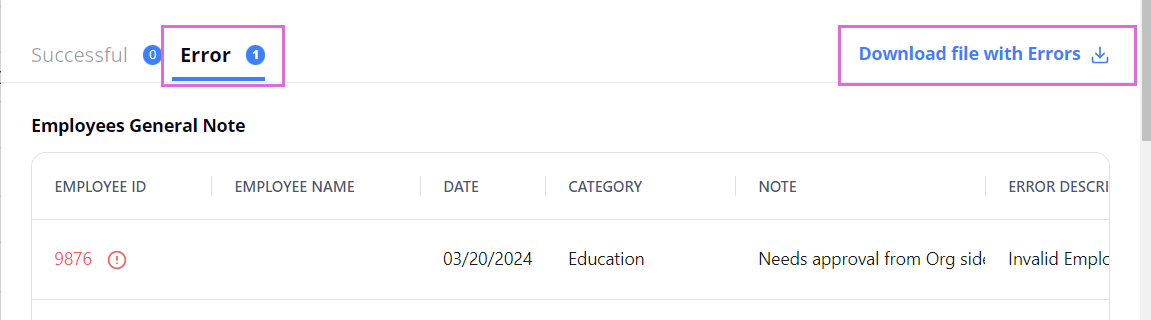
- Make sure that this time you only upload the fixed records and not all of them again, or they will duplicate the data loaded successfully the first time.
- The Successful tab displays successfully processed note records (Hide the imageSee the image.) To import them, proceed to Step 6.
- To import the successfully processed data, in the upper right, select Import.
After this, all the successfully imported notes appear in the General Notes section of the Employee's profile. If you have the proper permission, you may delete the unnecessary ones.
Watch videos
| Content | Video |
|
Add an Employee, part 1:
|
|
|
Add an Employee, part 2:
|
See also